

Man's Tie with Handkerchief and Shirt Tutorial
Feel free to share this tutorial with the credit link above.
First open a new image, as below.
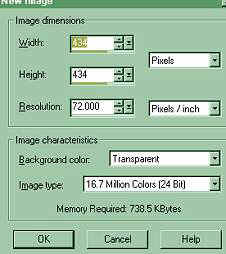
I always add a new layer to work on.
Open your line tool, which sways draw, as you can see below. Set it to the
options below, single line, width 2 or more and antialias checked.
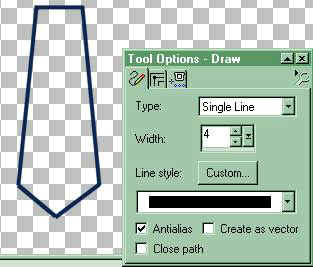
I rarely take the time work with the grid, but if you prefer better alignment use the grid
setting. I judge by the gray and white blocks. Make a short horizonal line for
the top, as you can see above. Then make a line coming down and slanted outward,
as seen above. The length of the line is up to how big you want the tie to be. Now
you can draw the other side or copy and mirror it. Now from the end of your side
line draw a short line inward, and the same on the other side to meet it. Refer
to the outline of my tie above as a guide where your lines should be placed.
Next, Take your magic wand tool, the black one with a yellow end, and click
in the center of the tie. Then, go on your toolbar and click Selections,
Modify and Expand. Set pixels to about 3, and click okay.
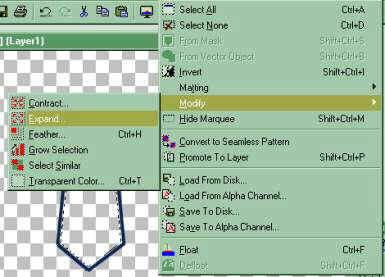
Now select the color of your choice for your tie and click on the flood fill tool, a tilted
can with a drop coming out of it. The tie will fill with the color.
Go to selections and select none. Now you can leave your tie as is or bevel it.
Then Selections, Select all, then Selections, invert. Now if you want to be
creative try using different plug ins to make it a different design.
I used Filter Factory A Holidays in Egypt for one.
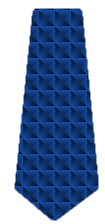
You can add anything or text to make it different.
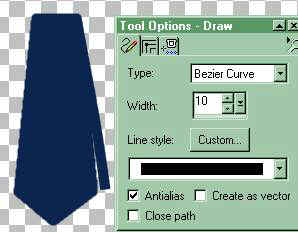
If you want a bit of the back of a tie showing. Open your line draw tool,
and set as below, then draw your line.
Now for the pocket matching handkerchief.
There are two ways you can do this.
Take your tie, go to Image and Flip.
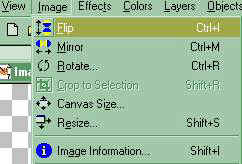
Then crop the top, which was
the bottom of your tie, to the size you want.
Or open a new image and use the Shape tool set at Pentagon, and
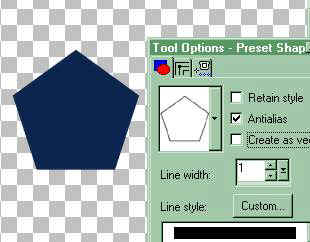
draw a shape in the color of your choice, then you would leave it
as is or add design or text.
Now you can make a tag using both or add to a shirt as above.
~~~~~~~~~~~~~~~~~~~~~~~~~~~~~~~~~~~~~~~
If you want to continue to making the shirt as on the top of the page,
click on Shirt Tutorial.
~~~~~~~~~~~~~~~~~~~~~~~~~~~~~~~~~~~~~~~
Feel free to E-Mail with questions or corrections.
~~~~~~~~~~~~~~~~~~~~~~~~~~~~~~~~~~~~~~~
If you use any of our graphics or share this tutorial,
you must provide a link back to mystyqcat.tripod.com/
Thank You
| Animated Background | |
|---|---|
| Frame on Fire Animated Tutorial | |
| Color Basics Tutorial - Part I | |
| Color Basics Tutorial - Part II | |
Check our main Tutorial page for new Tutorial listings at
~~~~~~~~~~~~~~~~~~~~~~~~~~~~~~~~
Our New Site Index is at Storme Millennium Index.
~~~~~~~~~~~~~~~~~~~~~~~~~~~~~~~~
This was created with PSP 7 ~ download a trial version.
[Links][Care][Help][Parlor][Storme Central] [Millennium] [Storme II][Den][Yard][Shelf]
[Garden][MadCat][Patriotic Porch][Study] [Patch] [Attic] [Ring] [Vacation] [Furship] [Add link]
[Designs] [Adoptions] [Halloween][Birthday] [Loft] [Snow] [Lists][Island] [Hostess]
[cards and services][Banners] [Graphics]][Award][Library][Game][Award][Card Index]
[Samples]Loft2][AdotptionPorch][Library][Tutorials][Garden Friends][Island2]
[Haunted Courthouse][GraphicII][Index][Postcards][Fireworks][Cat]
This page was last edited on January 5, 2004.